Managing Employees
When you open the employee tab, you are presented with a form which lets you search for employees using various filters.

various filters for viewing employee.
These filters let you view employees from specific company, branch, departments, designation, position, service type, service event type, employee types, gender, location or individual employee.
If you do not apply any filters and press Search button, it lists out all the employees that the logged in person has access to. HRs have company-wide access to employee data.
After clicking search, you are presented with list of employees matching the filters.
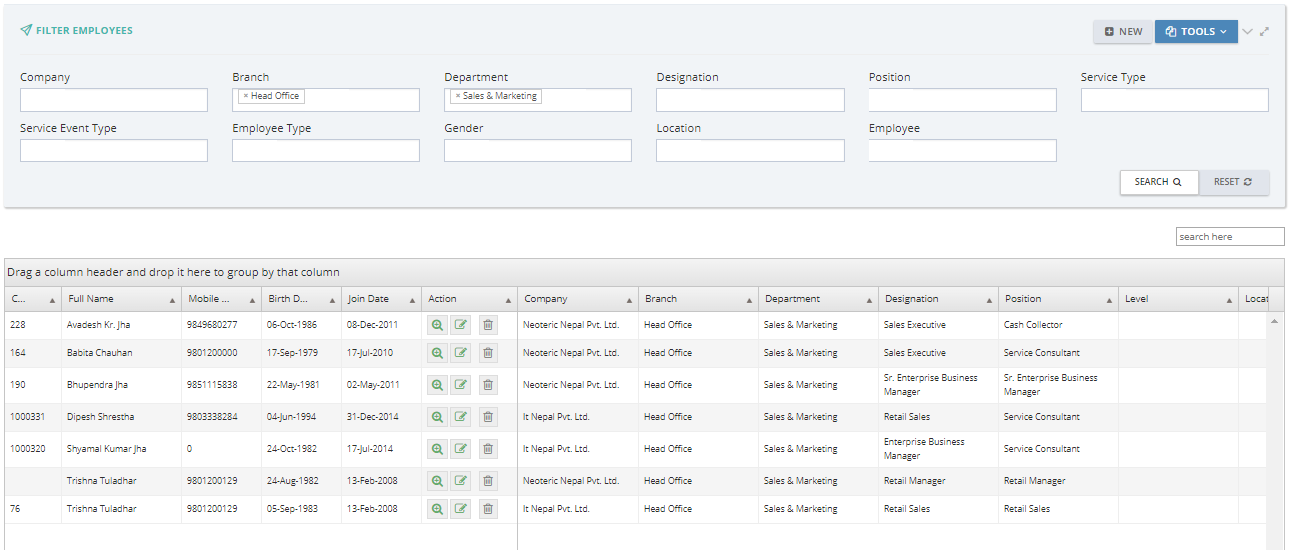
Matched employeed with applied filters.
With every employees matching the filters, there comes data associated with each employee in a tabular format. Also, every employee record has 3 buttons displayed:
View,edit and delete buttons(from left to right) displayed with each records.
View Details
This button allows to quickly view all details about an employee. e.g. name, address, position, history, trainings, service status, assets given to the employee, etc.

View,edit and delete buttons(from left to right) displayed with each records.
Edit Employee
The edit option lets users to update data about the employee, using the exact form and options that are used when Creating an Employee
Delete Employee Record
With this button, you can delete an employee record so that it doesnt appear in the employee list. But this is not the suggested way to retire an employee. This is only useful when you want to delete an erroneous record created without intention of actually using them e.g test users. Deleting an record from this panel might result in inconsistency across other modules. You can retire an employee using retire an employee